Scroll down for previous entries...
3.4.4 Avoiding irregular results
Make sure,
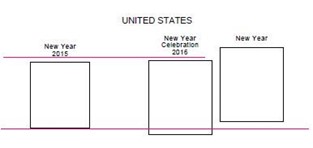
your headings are always similar (0 – 1 or 2 lines).
This will make it a lot easier to align rows.
Using ROW_ALIGN_TOP but changing hearder lines, wil result in boxes that are pushed down)
Using ROW_ALIGN_BOTTOM but changing header lines, will push boxes down if you use more header lines, and will lift up the box if you suddenly start using less header lines.
“ROW_ALIGN_TOP” is the default setting, headers will start on the same ‘line’
“ROW_ALIGN_BOTTOM” makes boxes align on the bottom line, if we use the ame number of heading lines.
If you do not need two text lines in the header, you can use the \n command to use one text line and one blank line. The blank line can be before or after the text line. The program will see it as two lines.
Too many
boxes on one line? Use the ROW_START_FS comand
to start a new line;
If the align-command is above the Page_Start command, aligning will be continued,
if you added an align-command after the page_start command, you might have to add
it again.
Too many
lines on one page? Use the PAGE_START command
once more, to start a new page.
Do not forget to copy-paste the settings before ROW_START_FS from the previous page.
3.5 Completing the Stamp_Add parameters
So far, we have not
used the extra 6 parameters in the Stamp_add – command.
We left the 6 pair of double (straight) quotes empty.
Of course they are there for a reason.
Delete all commands under the Row_Start_Fs – command.
Copy following code to the program:
STAMP_ADD (25.0 35.0 "A" "B " "C" "D" "E" "F")
STAMP_HEADING (HN 9 "New Year\n")Save this design as ‘Test design 4b'
Now we only have one single box in our design, and the A, B, C, D, E, en F will show where the parameters are good for:
Click generate and PDF to see the result:
Of course,
you are free to use one or more of those options.
Inside the box, text is often placed that doesnot remain visible when an object
is placed in the frame (stamp, card, sticker, label, ….
Example for A/B/C
· “20 cent” – for
a stamp
“(20 cent)”
– for a stamp without face value
“Forever” /
“EUROPE” ….
“Blue”
“imperforated”
Watermark 2
Outside the
box, text is placed that remains visible after inserting an object in the box.
D/E/F is the subtext left, middle and right underneath the box (example :
catalog numbering)
· Yt 123 Mi 140 SG 120
There are 6 pm’s to write text inside or below the boxes. There are 6 ‘double quotes’ but that does not mean you have to put text in each of them:
Try some possibilities:
ROW_START_FS (HN 6 0.2 4.0)
STAMP_ADD (28.0 31.0 "A 10" "B 20 " "C 30" " " " " " ")STAMP_HEADING (HN 9 "New Year\n")
ROW_START_FS (HN 6 0.2 4.0)
STAMP_HEADING (HN 9 "New Year\n")
ROW_START_FS (HN 6 0.2 4.0)
STAMP_ADD (28.0 31.0 "A
10" " " "C 30" " " "E 50" "
")
STAMP_HEADING
(HN 9 "New Year\n")
Now you have
all basic ingredients for your own album.
In module 2, all four themes will be worked out more deeply.
to be continued...
previous part : https://rainbowstampsandcoins.blogspot.com/2021/04/making-your-own-album-09.html
next part : https://rainbowstampsandcoins.blogspot.com/2021/04/making-your-own-album-11.html


No comments:
Post a Comment